Sunday, February 16, 2014

Soap Challenge Club - Embed Soaps 1-16-14

The soap challenge for this month is "Embed Soaps" offered by Amy Warden of Great Cakes Soapworks. I can't wait to see the creations from all the other talented soap makers, I love looking at their soaps as much as I enjoy making my soaps. Please don't forget to go to Amy's blog page HERE to enjoy everyone's soap entries, along with Amy's beautiful soaps.
I love looking at pictures of soaps with embeds. You may be asking just what is an "Embed", according to Merriam-Webster Dictionary  on its web site HERE it is described as:" em·bed  verb  \im-ˈbed\: to place or set (something) firmly in something else. I have decided that I wanted to make two different soaps, one for the girls and one for the boys. For the girls I will be embedding hearts,  and for the boys mustaches. I had to make the embeds for the soaps a few days before I made the actual soap, that way  they had time to set up enough to get them out of the molds.
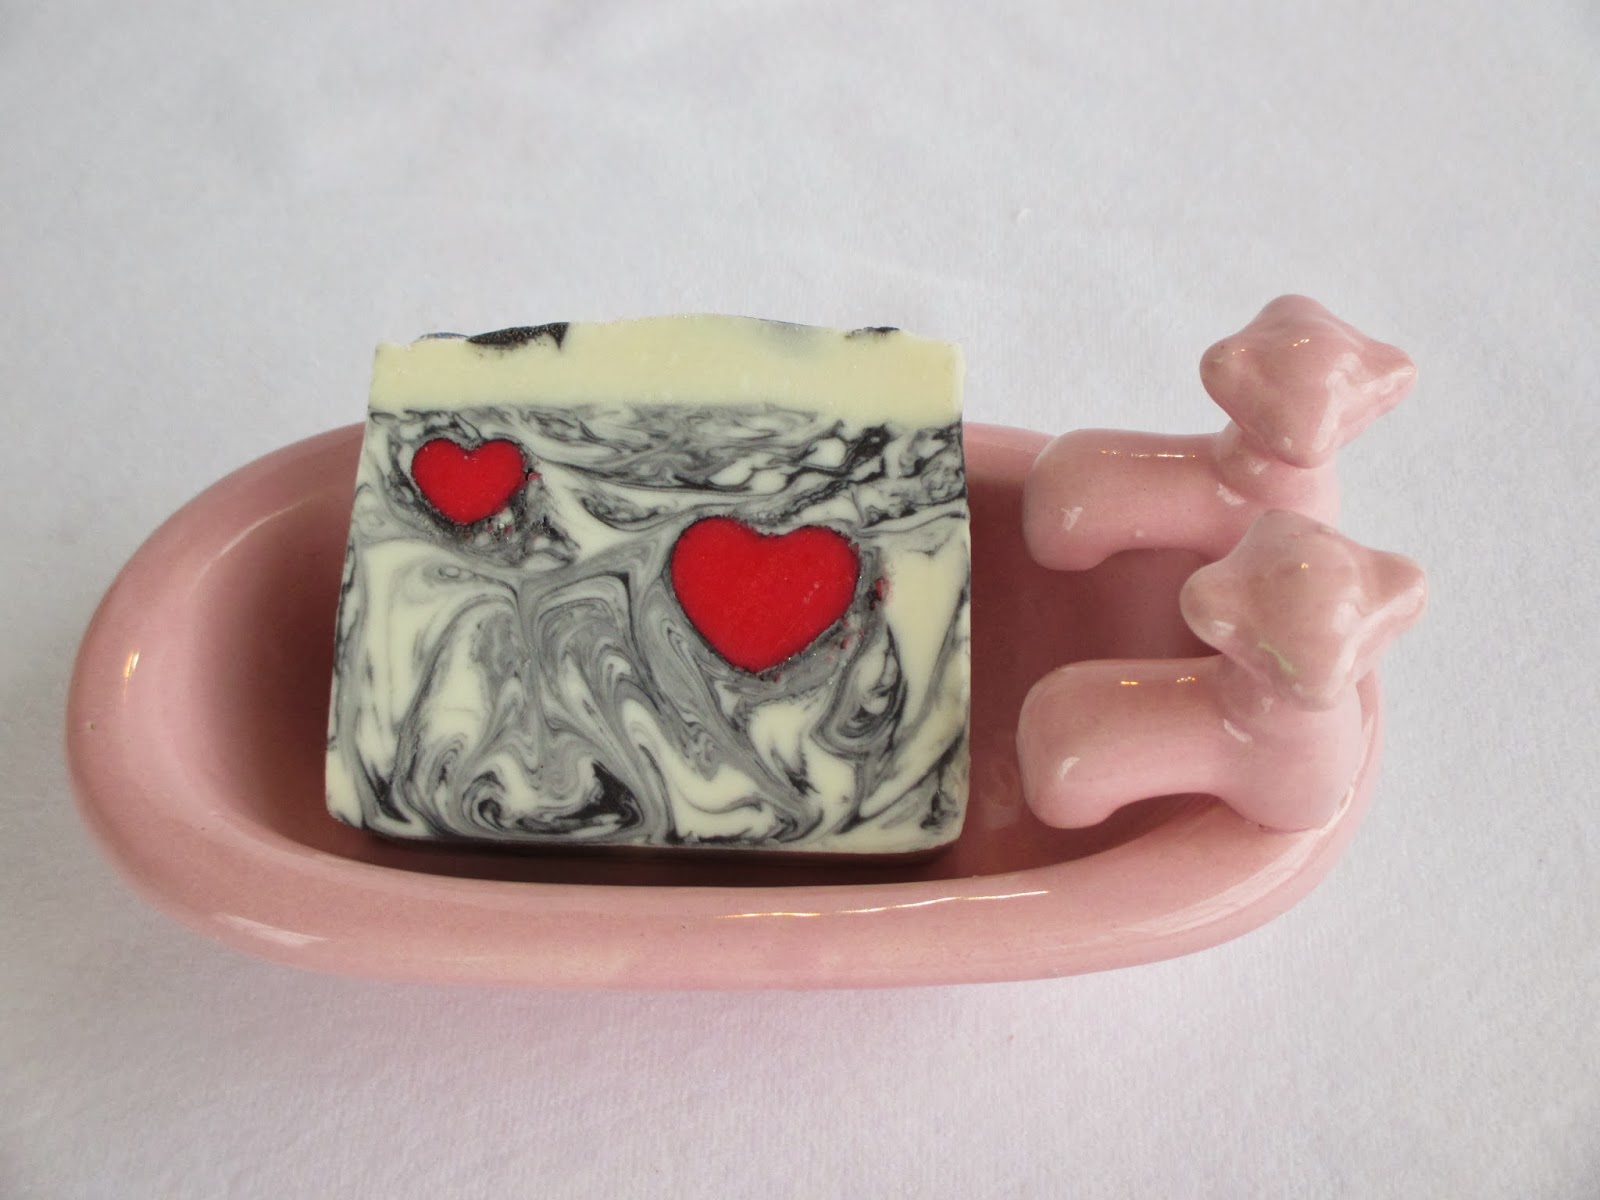
The soap I am entering in this month's Soap Challenge will be the girls soap with heart embeds. I love how  the red hearts just pop out in the white & black swirled soap. I think they will make a nice gift for Mother's Day, and would be a perfect soap for Valentine's Day also.  Recently I read  Jennifer's Handmade Soap blog and she wrote a tutorial on how to make a " Dusted Embed Soap".  I got pretty excited reading about how to do it, it was perfect timing for my heart embed soap.  Jennifer gave me permission to share the link to her blog and her great instructions. You will enjoy seeing her beautiful soaps and the instructions HERE.
I used a fragrance from Wholesale Supply Plus in this soap "Pink Berry Mimosa", and for colors I used Titanium Dioxide for the white and Activated Charcoal for the black. The small heart embed mold I purchased on Etsy, and the larger heart I purchased from Bramble Berry. I loved how easy the hearts released from the molds, if you plan on making a soap using embeds I would recommend purchasing this type of a mold.
Embeds in the mold, ready to unmold.


Embeds out of the molds. OK lets get to making some soap.
 
Coated in the Activated Charcoal.
Messy, messy, messy!


Here I have added the first heart embed. Next I will add the last
heart embed and the remaining swirled soap.
I added a layer of white soap base and some soap dots,
that I will turn into a heart design....


Inserted my tiny heart embeds onto the
black hearts I made with the soap dots.


I love close up pictures of the tops!


Unmolded soap log, I can't wait to cut it
and see what the inside looks like.


Very excited on how the soap turned out.


It is so neat that with a swirled soap that every bar of soap
looks different, like having their own personality.


Look at the soap on the left, the swirling
made a white heart next to the red one, I love it.


For the man's soap I used a fragrance from Bramble Berry called "Blue Man". I knew it would discolor the soap so for the swirl color I chose "Blue Vibrance Mica", I wanted the blue to pop out in the soap after it discolored. The Moustaches I used  Activated Charcoal for the black.


Aren't they so cute.
Makes you smile just looking at them.


Swirled soap before adding the embeds.


I usually have a hard time lining up my embeds so that when
I cut the soap they are spaced equally, so I taped some dental  
floss across mold before putting on the embeds, it worked
really well for the proper placement.


Unmolded soap, ready to cut.


Cut soaps before they discolored.


Here is the final color of the soaps after they discolored.


Don't they make a cute couple   :)


Thursday, January 16, 2014

Soap Challenge Club - Taiwan Swirl 1-16-14

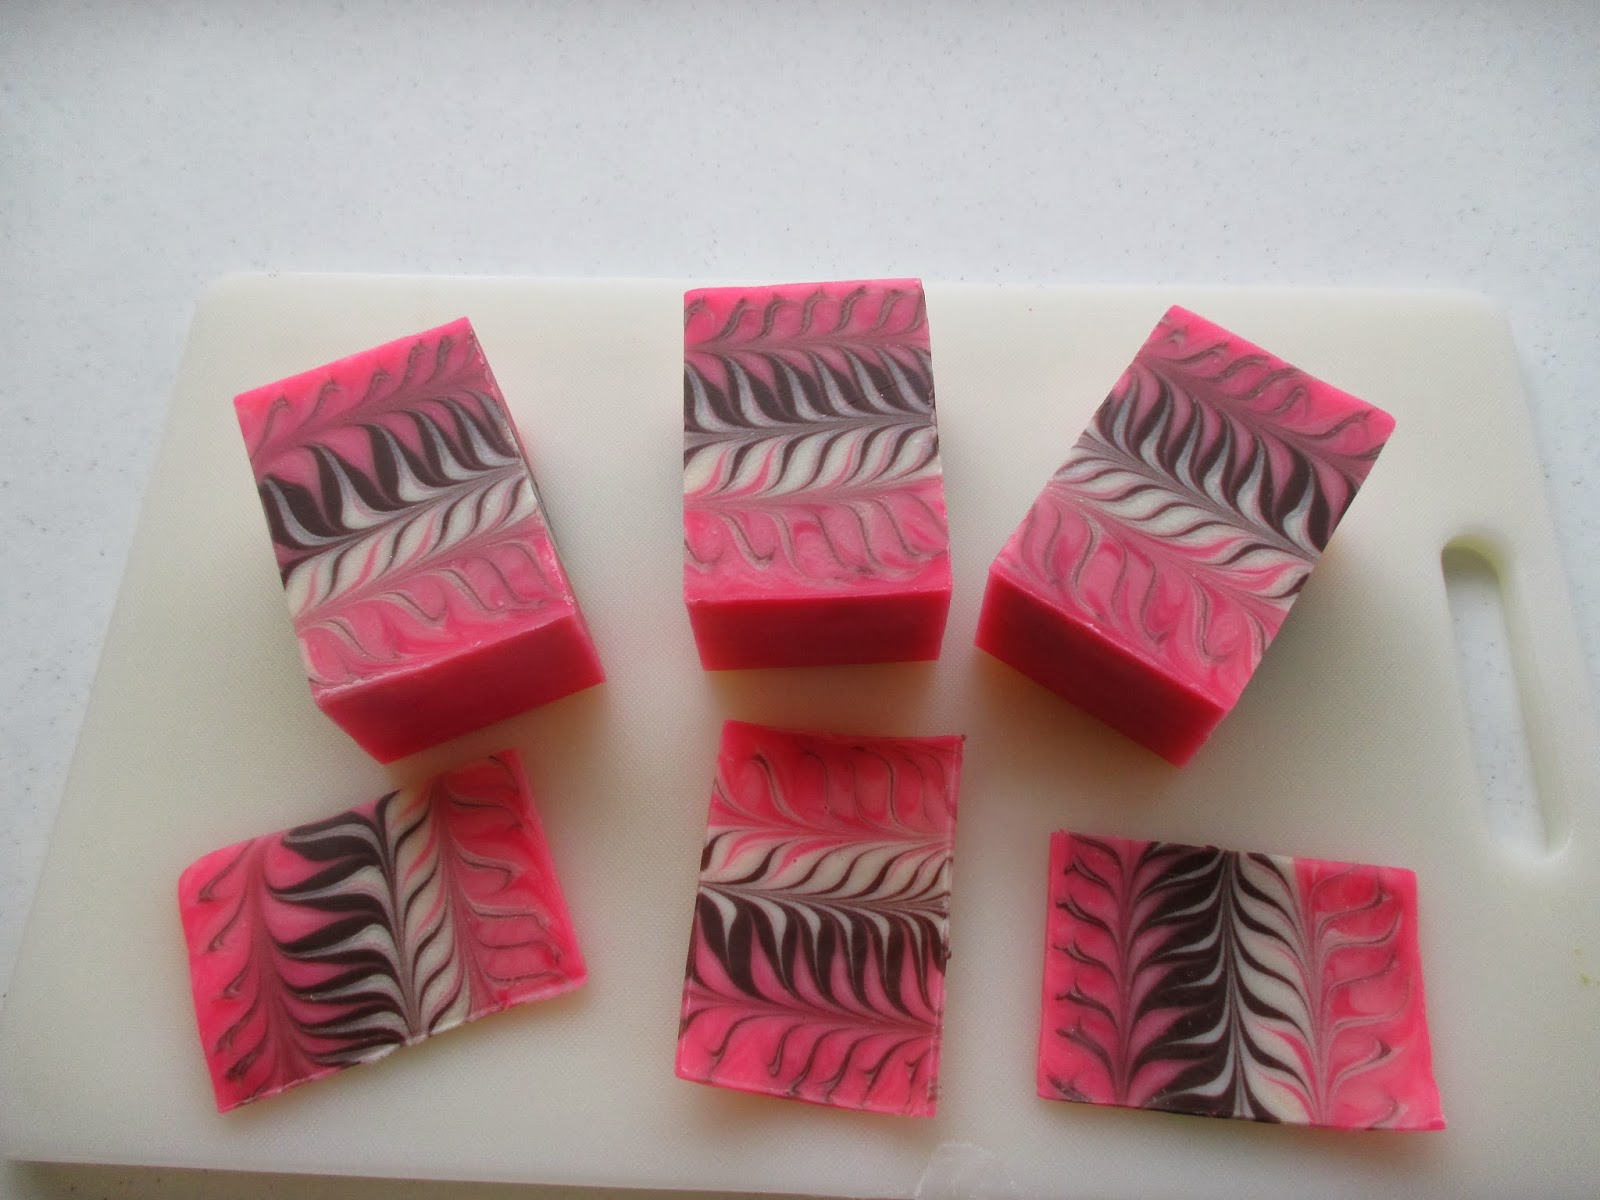
Well here it is another month and a new year.  Things have settled down after the holidays and what a better way to start out 2014 than with another  new soap challenge offered by Amy Worden of Great Cakes Soapworks.  I thoroughly enjoyed this one which is called the "Taiwan Swirl". It is not a hard swirl to do if you have a soap that does not come to trace too fast, and the results are fabulous. The hardest part of this swirl for me was choosing what colors I would use, and what would be a safe fragrance that would behave in the soap long enough for me to complete the swirl. 
I made 2 different soaps using this technique, and also used 2 different fragrances. For the soap that I chose to enter into the challenge I used a fragrance from Natures Garden Candle & Soap Supplies  called "Honey Bunny". Here is their description of this fragrance: "This fragrance oil by Natures Garden opens with sparkling notes of bergamot, sweet orange, and crisp apple; followed by rich, golden honey nectar, toffee bits, and soft white musk mingling together to create a sweet treat as natural as sunshine."  The colors I decided on for this soap were: Fired Up Fuchsia, and Brown Oxide from Bramble Berry, and for the white I used Titanium Dioxide.
I decided to try an In-The-Pot swirl with the 2 pink colors and see how that would turn out. Lets see what happens.......
OK, now on to the pictures of my Soap Challenge entry:


Colors are ready to add to the mold.

Colored soap poured into the mold. The next step is
to remove the dividers so I can do the swirl. Notice the
In-The-Pot swirl with the 2 shades of pink.
Just finishing the first step of the swirl.
 
Here I have completed the Taiwan Swirl.
I really like the In-The-Pot swirl with the two pink colors.


Here is the soap unmolded and ready for cutting into bars.

 
Here's the first cut, and I have shaved a thin slice off of
the top to showcase the swirl.

 
The completed soaps cut.

Close up picture of the swirl.


For my second soap I used a fragrance from Aroma Haven called "Pomegranate & Ginger". In this soap I wanted to have a teal, a purple, a white, and a black. For the teal I used some liquid colors from Select Shades. With these colors they have a color chart to choose what color you want, then you mix other colors to obtain that color.  You can see in my pictures of the soap in the mold that the teal is more of a green color rather than a teal. My first reaction was that these colors don't really work, but as the soap cured it turned a lovely teal, just the color I was aiming for. I can't wait to make more soap using their colors. For the purple I used Nuture Soap Supplies Purple Rainbow Mica with a tad bit of Ultra Marine Blue Oxide added to get a darker purple, Activated Charcoal for black, and Titanium Dioxide for white.
 
Here are a few pictures of this soap.
 
Here are the colors and the swirl completed.


Friday, December 13, 2013

Soap Challenge Club - Column Pour 12-13-13

This month's soap challenge offered by Amy Worden of Great Cakes Soapworks is called  "Column Pour", or Column Swirl. 

I have been waiting for a long time to do this technique. I found a star shaped ceramic candle holder at a Goodwill store a while back and thought it would be perfect for a column swirl and couldn't wait to try it. As a soaper  I look at a lot of things differently now, I am constantly looking at things and wonder if I can use it for soaping, or will it make a good soap mold. Some of my finds have worked really well, while others have not. I think this star shaped candle holder worked out perfectly for a column pour and will save it for future soap batches. I don't think it will ever see a candle again, but lots of soap    :)

I used Bramble Berry's "Kumquat" fragrance oil and it is AMAZING! It does not accelerate in the soap and gave me plenty of time to accomplish the column pour. Beside behaving in the soaping process it also smells wonderful. For my colors I used Titanium Dioxide, and the following mica's: Magic Pink, Apple Green, Luster Grey, and Melon Orange.

One day while reading  Otion's Soap Blog they had featured a column swirl created by Kat, it was so beautiful, you can check it out here. She used a circular pattern for the swirl. I love it so much I decided to give it a try also.  Mine did not even come close to being as nice as Kat's, but I sure had fun doing it. 


Here is the picture of Kat's Column Swirled soap,
which was the inspiration for my soap.


Now here are the pictures of my soaps, I hope you will enjoy them also.


My colors are mixed and ready to pour.
Here is the star candle holder I am using for my column.


Here is the first pour of each color of the soap.


All the colors have been poured and I
have removed the star column.


Here I have completed the first part of my swirl.


I have now completed the circular part of the swirl.


A close-up of the center, the middle section reminds me of a snail shell.


Cut into bars.


It sure looks different after they are cut into bars of soap.


Friday, November 15, 2013

Soap Challenge Club - Squeeze Bottle Design 11-15-13

This month's soap challenge offered by Amy Worden of Great Cakes Soapworks is called  "Squeeze Bottle Design". 

To make this month's soap we decide on a design or draw a design and use it as a template on the bottom of the soap mold with piece of butcher paper liner over the top of the design, and use squeeze bottles (similar to ketchup or mustard squirt bottle) with our soap colors to create the design on the bottom of the soap mold using the template as our guide. My mold is silicone so I put the design on the bottom of the wood support for my silicone mold and put my silicone mold on top of the design. I found a scroll design online and  made several copies of it to fit across my mold.

Well after I mixed up the colors and added them into the very small squeeze bottles (they were only 4" tall from the bottom to the top of the tip) and started on my pattern. I quickly found out that the lines were too intricate and I could not get my soap lines as fine as I wanted them to be, I also could not add all the lines in the pattern.  Here are a few pictures of the making of my soap. I scented it with Lavender Lemon and used mica's from The Conservatorie and Nurture Soap Supplies.

For me, this challenge was harder than I thought it would be. I plan on making more soap using this technique and try to perfect the process. Thank you Amy for the challenge, I love learning all the new ways to make soap and cannot wait for next month's challenge.


Here is the design I decided on.


The cute little squirt bottles with the colors added.
The design is completed the best I could do.
I would have loved to had the very fine lines over these thick lines
I love the swirl on the bottom of the soap bars.

Here is the soap out of the mold.


The cut bars.


Lavender Lemon Soap.