Saturday, May 26, 2012

Week 10 of the weekly "Soap Challenge".

This week's soap challenge was to make a "Landscape Soap". The first challenge for me in even doing this soap was to think of a landscape that I thought I would be capable of doing. I have been thinking about it for a couple of weeks as I knew I would need to do my embeds for this soap ahead of time, so I decided  to do a sunrise scene. I wanted the soap to look like a slice of the earth (like you see in gardening books showing your planting layers). The week before I made extra soap base so I could create the sun ahead of time.
For my colors I used a brown mica for the ground, green oxide for the grass, for the sky I used ultra marine blue and added a blue mica, for the clouds I added a white mica to the natural soap base. I scented the soap using a "Eucalyptus & Spearmint" fragrance oil. I was not sure how this fragrance would behave so I added some to each layer as I did them, instead of to the whole batch. When I sliced the soap on my cutter it was a bit hard to get through the sun part in the soap since it was made the week before and was quite a bit harder, but it did cut it without breaking the cutting wire.

This was a fun challenge and I would like to try this again and hopefully my imagination can come up with something with a lot more detail.
I will share some of the pictures of the process and the finished soap. I hope you will all go to Great Cakes Soapworks  and take a look at all the other great soaps made for this challenge.

Next week's challenge: Making soaps using natural ingredients.

Here is the tube I used to make the sun. I tried something new to plug the bottome of the pipe, I poured some heated melt & pour soap base in the small plastic container and while it was still melted I put the pipe in and let the soap base cool before I added my cp soap base. It worked really well and I did not have to worry about the bottom leaking, plus when I pushed my soap out of the tube I was pushing against the melt & our base and not the actual soap embed. 


Here is the sun out of the pipe mold. Now I will cut off the
melt & pour soap plug and it will be ready to embed into my soap.


The brown first layer poured.
Mixing the green next layer. 


Green layer added. I am making peaks on this layer hoping that it will look like grass standing upright. It did not look that tall after pouring on the sky color, I think I should have let it set up longer.


The blue is poured, added the sun and more clouds.


I added the remainder white soap base and swirled
the top to make it look like fluffy clouds. 


Here is the soap out of the mold. I lined my mold using
plastic and I don't like the wrinkles it created on the sides.
Note to self: take the time to line it with the normal
butcher paper. A silicone mold insert would be nice  :)


Soap bars cut.


I took the end cuts from the soap loaf and
made soap balls again to use as embeds.
I think they look like little world globes, what do you think?


Introducing "Rise n' Shine"

Todays Forecast - Sunny, Partially Cloudy with a  'Chance of Showers'.

Sunday, May 20, 2012

Week 9 of the weekly "Soap Challenge".


This week's soap challenge was to make a "Peaked Soap". This is not a new technique for me and after watching the video Amy mentioned by Holly of Missouri River Soap, I decided to try Holly's method. The peaks on the video looked interesting and I would be able to attempt something completely different than my usual texture for the top of my soap.
For my swirl colorant I am using a Green Oxide. The fragrance I chose for this soap is "White Gardenia", I love this fragrance but in a previous batch it did trace fast (as a lot of floral scents seem to do when I use them), so I was mentally prepared to move fast if needed to get the soap into the mold. I chose to do the "room temperature" method of soaping. This method is to get all my oils heated and mixed together and my water/lye solution mixed the night before then when I soap the next day they are both at the same temperature (hence room temperature). Well to my surprise the soap behaved really well with the fragrance and I did not have a fast  trace. I was able to achieve a nice swirl, and the peaks worked out great for the top. This soap was so fun to make, besides smelling wonderful!

I will share some of the pictures of the process and the finished soap. I hope you will all go to Great Cakes Soapworks  and take a look at all the other great peaked soaps.

Next week's challenge: Landscape Soap. I have no idea what a "Landscape Soap" is and just the thought of trying to create a landscape soap seems very intimidating. Well I guess we will see what that is all about next week. Hope you come back and see what happens.

Swirl completed and ready for the top.

Starting the first row of the peaked top.


Row two and everything is going well.


Top Completed ~ Yahoo!!


Soap log out of the mold.


Cut Bars. I love how the swirl turned out.
I am hooked on swirled soap.


This shows the top peaks of the soap.


Saturday, May 5, 2012

Week 7 of the weekly "Soap Challenge".


This week's soap challenge is to create a gradient colored soap. This technique is new to me and I am very excited to try my hand at it. The idea is to have your colors start out one color and gradually lighten or darken with each pour. Amy Warden from Great Cakes Soapworks shared a great video showing a good technique to accomplish this, starting with a darker color as the bottom pour and lighten the soap as you pour each layer.

I decided to use burgundy oxide for my base color and gradually lighten it for each additional pour. I fragranced this soap with  "Black Raspberry Vanilla". I love this fragrance and can't resist smelling it every time I go into the curing. I wanted to also try doing a color line between my color layer and my white top layer, for that I used cocoa powder, applied with a tea infuser strainer.

Basically the soaping process went very well, the recipe stayed fluid to get a good pour and the fragrance oil did not accelerate the trace. Did you notice that I said it "Basically" went well.......the first mishap was when I was dusting the cocoa powder on the last colored layer and was almost done when I lost my grip on the tea infuser strainer, and of course it had to plop right into the soap. Well I fixed that the best I could then sprinkled on more cocoa powder. OK, now onto cleaning the cocoa powder dust from the soap mold so there won't be any of the dust getting onto the sides of the white soap base for the top. With a damp paper towel I cleaned around all the edges and it was looking really good, then..... I dropped the paper towel right in the middle of the soap again, gurr. Fixed the soap again and sprinkled more cocoa powder onto the soap. Now for the white top color, that I spooned on gently so it would not mess up the cocoa powder line (after all I tried to mess it up twice and did not want any more mishaps). I am happy to say that went well, I had some pink left over and could not resist adding a swirl to the top (I really love swirls).

To me the burgundy color seemed too dark for the bottom layer and did not show much of a color difference in the next two pours, but then I could really notice the color differences in the remaining pours. I loved doing this technique and already have some other projects planned.

Here are some pictures of the process and the finished soap. Please go to this link: Great Cakes Soapworks. to see all the other beautiful soaps that everyone else has made. Next week's challenge: Salt Bars, please check back.

Mixing the color.


The final color being poured.

Starting to sprinkle on the cocoa powder line.


Left over soap color for the swirl.


The completed swirl...did I mention how much I love swirls?


Soap log out of the mold.


Soap log out of the mold....another view.


Cut bars, made soap balls with the ends for embeds.


Friday, April 27, 2012

Week 6 of the weekly "Soap Challenge".

This week's soap challenge is a technique called "Faux Funnel Pour". I have made a soap similar to this technique where you pour your lightly traced, colored soap base through a funnel held over your soap mold. In the faux funnel pour you are not using a funnel to pour into and instead are pouring a small amount of your soap base directly into your mold, then you pour the next color on top of the first color, and continue the same process with the other colors. You continue to alternate your colors until you have either used all your colors or filled your mold.

I decided to use 5 colors for my pour, yellow, blue, green, lavender, and white. I prepared my colors ahead for mixing in the soap base, then proceeded to make my soap. I fragranced this soap using Bramble Berries fragrance oil "Ginger Ale" (formally called Ginger Fish), this is an amazing fragrance.   

After mixing the soap base into the prepared colors and stick blending to get the colors completely blended, the soap started getting a bit thick. That is not good for a funnel pour, you want the soap base to be fluid enough to flow when poured. Well I had to "glob" the soap into the mold before it got too thick. I was afraid that I would have a lot of air pockets throughout the soap because of how thick it was getting, so I tapped the mold several times on the counter between layers to hopefully force out any trapped air pockets.
Maybe I should call this technique a "Glob Swirl" instead. It was very fun and can't wait to try it again and hopefully with a soap recipe that won't come to a thick trace as fast. I love how each bar has it's own character, and they smell so good.

I will post some pictures of the process and the finished soap. To see everyone else's beautiful creations check out this link: Great Cakes Soapworks.   I look forward to next weeks challenge. Be sure to check back and see what that will be!


Mixing the colors with the soap base.


Oh no the soap is starting to thicken.


Notice how thick the soap is and no flow at all.

Finished with the "Glob Pour", now to texture the top.
Finished top of soap.

Soap loaf out of the mold.


Cut bars.


Saturday, April 14, 2012

Week 4 of the weekly "Soap Challenge"

This week's soap challenge was making a soap using alcohol. I have previously made a soap using beer so thought I would do something different and use wine. I don't drink wine so can't say I know a lot about it but decided on a Red Cabernet wine. The fragrance oil I used is called "Christmas Cabernet".  Here is the description from the vender: "Cabernet has a classically deep red color and displays a lovely bouquet of berries and oak. A full-bodied wine with good varietal character and power, it offers rich cherry flavors with excellent balance and a long finish. We have combined this lovely aroma with hints of Christmas time, and created our version of Christmas Cabernet. You will want to celebrate when you smell this fragrance!".  It is a really nice fragrance and I thought it would complement the wine soap I am making.
Well now on to the process....I first boiled the wine to get any carbonation out of it, then I let it cool in the refrigerator. After it had cooled I poured it into ice trays and froze it. I weighed out the frozen wine to required amount of ounces for my recipe on my scale, I then remember reading instructions on making my beer soap that I was to weigh the ounces by fluid ounce in a measuring cup, not by a weight. Oh well I was not wanting to wait to make my soap so decided to just use my measured amount by weight on the scale. I was a bit worried that when I added my lye to the wine ice cubes that I could get a "lye volcano" reaction so I put the ice cubes in a large plastic pitcher and slowly poured in my lye and kept stirring it to be sure it would dissolve. Well the lye and wine reacted  just fine, no volcano here. I wanted to add Tussah Silk to my soap, so I added a cotton ball size to the lye and wine mixture, well my lye mixture NEVER got hotter than 85 degrees and would not dissolve the silk. I took the un-dissolved silk out of the lye mixture and added it to my oils and stick blended the silk into the oils, most of the silk dissolved or pulverized in the oils. I then added my lye mixture to the oils and began to stick blend. I blended and blended and blended and nothing was even beginning to look like a light trace so I added the fragrance oil and stick blended some more and still no trace. I am thinking it might be because of the way I measured the amount of wine, but whatever it was I was getting a little concerned. I poured out a small amount of the soap mixture and added it to some titanium dioxide for the swirling and set it aside, then added burgundy oxide to the main soap batter and continued on with the stick blending. Well finally the soap got a very light trace so I went ahead and poured it into my mold, added the swirl color and finished the swirl. I used a heating pad to get the soap warm enough to gel. I am happy to say the soap turned out in spite of everything , and I am happy with it. Another great challenge . Be sure and check out Amy's blog here:  Great Cakes Soapworks  to see everyone's else's great soaps. Next week's challenge is mixing our own fragrance oils or essential oils.


Here is the lye mixing in with the wine ice cubes.


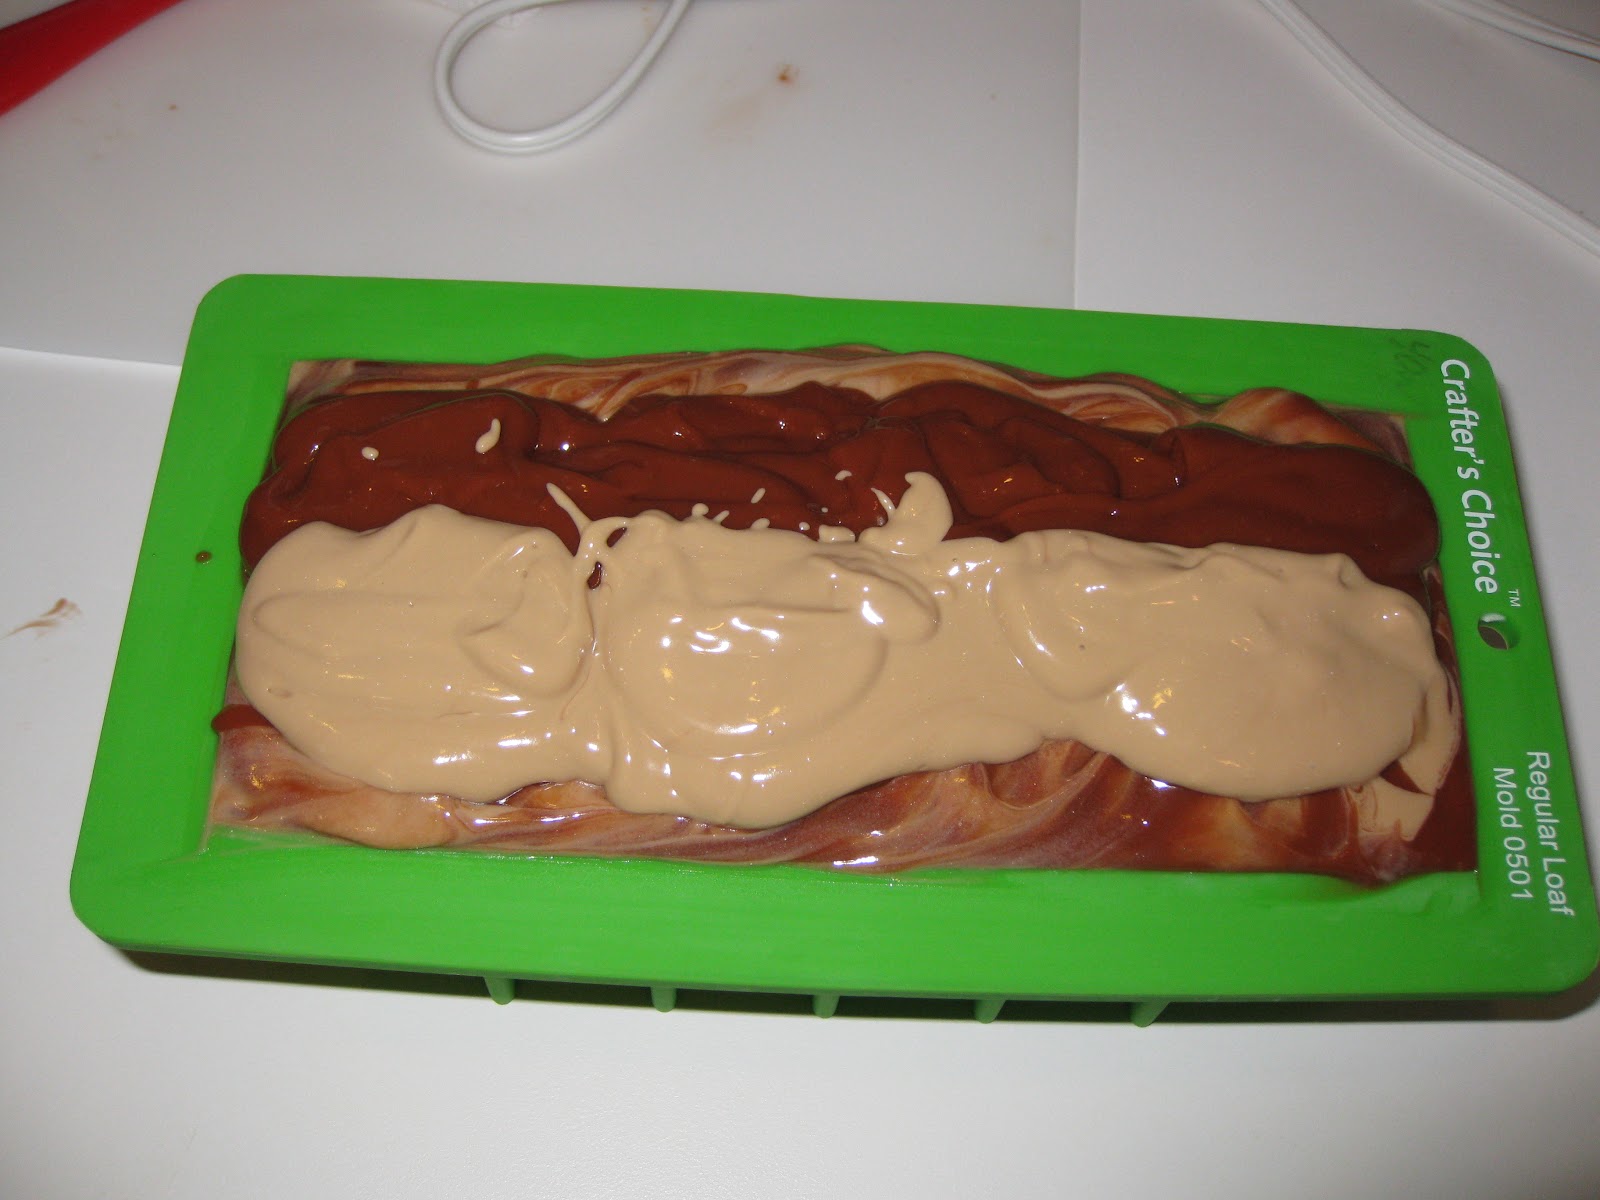
This is the soap batter mixed with the colors.
Looks like catsup and mustard to me.


Ready to swirl the bottom layer.


Now to do the swirl on the top of the soap.


Top swirl finished.


Soap out of the mold.


Cut bars finished.


Introducing

"BEARly Cabernet"

A nourishing shea butter wine soap


Sunday, April 8, 2012

Week 3 of  the weekly "Soap Challenge".  

This week's soap challenge was piping soap, think of decorating cakes but using a soap instead of frosting. I told myself that it sounds pretty easy, I think I can manage this one. I watched Amy's video from Great Cakes Soapworks  and also watched some videos on YouTube. Now it was my turn.....after mixing my soap batter I separated it into 3 measuring cups, I colored one with a yellow mica, one with yellow oxide, and the last with titanium dioxide (for the frosting). The fragrance I used for the cake was lemongrass, and the frosting was fragranced with lime. For the bottom of the cake I poured the lemon mica colored soap, then I poured the yellow oxide colored soap, holding it up high as I poured around the mold, and I did the same with some of the white soap, then swirled the colors. I had enough yellow soap batter left to pour 5 cupcakes. Now for the frosting,...it took a long time for the soap to get thick enough to frost. I stick blended it, let it rest a long time, stirred it some more, let it rest, stirred it some more, and finally it was ready to start to pipe (over an hour later). The tip I used was Wilton's #2D. Took me a few tries practicing on a piece of wax paper to get the hang of piping the soap, then on to the cake. I went around the outside of the cake first, then continued in rounds until I got to the middle with one last dollop to finish the cake. Then to frost the cupcakes, this was a lot harder for me to get it tall enough and have it look like it was not leaning. Finally after the first 2 cupcakes they starting looking more even by the time I reached the top of the swirl. I still had a lot of frosting batter left and not knowing what to do with it I made 2 more rounds around the cake and a dollop in the center. I then added some of Wilton's Sugar Pearls on both the cake and the cupcake. A few days later I unmolded the cake and cut it into 6 pieces, they weigh 4.7 oz. to 5.2 oz each. I did not like the look of the frosting on mine as well after cutting, the dollop in the middle of course got cut 6 ways and was not at all attractive so I cut it down some. I want to try this again and have some other ideas for the piping where it won't look so busy.
For me this was a HUGH challenge and this is what I have learned from it:

#1: It is not as easy as it looks by watching people doing it on YouTube, and I have a new found respect for their talents.
#2: I need to take cake decorating lessons!!!!

#3: I need TONS of practice. Guess we will be eating a lot of cakes and cupcakes in the future.


Thank you Amy for the "Challenge" and I can't wait for next week's challenge, "Soaping with Alcohol". My first thought about that challenge is: I wonder if spraying the top of my soaps with 91% alcohol would count as soaping with alcohol? That's not much of a challenge is it, so guess I better get my thinking cap on and get to planning. Stay tuned for next week......

Swirling in the colors.

The frosting is not thick enough yet.

Finally thick enough to frost.


Here I go...wish me luck.

Almost done.


Now for the cupcakes.


Whew...all done.


Here they are out of the mold.


The cake soap cut.

The finished cupcakes.

Introducing my Lemon/Lime cupcakes.